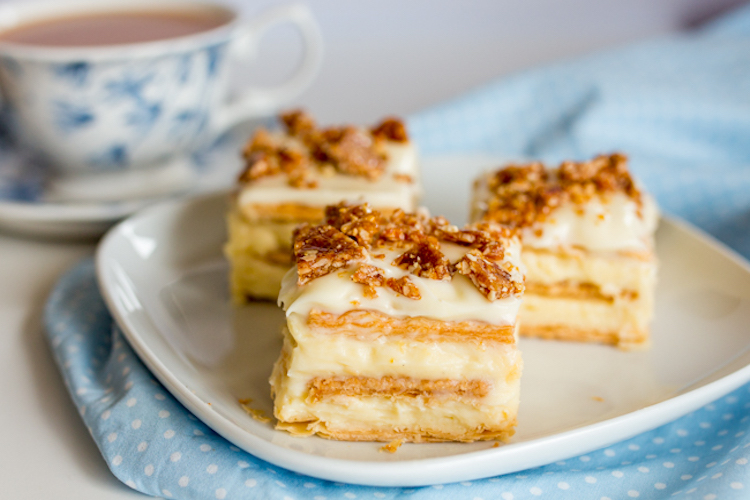
Vanilla Slice with Hazelnut Crunch
Prep time
Cook time
Total time
Author: Nicky Corbishley
Recipe type: Dessert
Serves: 16
Ingredients
Pastry
- 2x320g/11.25oz sheets of ready rolled puff pastry
- 3 heaped tbsp icing/powdered sugar
Custard
- 500ml/17fl oz whole milk
- 100ml/3.4fl 0z double/heavy cream
- 1 vanilla pod (you can replace with 1 tsp vanilla extract)
- 50g/1.7oz cornflour
- 5 egg yolks
- 140g/5oz caster sugar
- 40g/1.4oz unsalted butter
Topping:
- 100g/3.5oz golden caster sugar
- 75g/2.6oz chopped hazelnuts
- 200g/7oz icing/powdered sugar
- 7-10tbsp double/heavy cream
Instructions
- Start with your pastry first. Preheat the oven to 200c/390f. Take a 20x20cm square cake tin with a removable base (you'll use this tin later for constructing the vanilla slices), and use the removable base as a guide for cutting the pastry. You'll need 1 piece of pastry that is just a little under 20x20cm. This will make up the base of your vanilla slice. Place it on a baking tray.
- You'll then need 2 more pieces of pastry just under 20x20cm too. These pieces should be cut into 5x5cm squares. You should end up with 32 squares. Place 16 on one baking tray and 16 on the other. Cutting these squares now will make it easier to cut the vanilla slices later on. Sprinkle one tbsp of icing/powdered sugar on each of the three lots of pastry. Place a sheet of baking parchment on top of each tray. Take one of the trays and place an empty baking tray on top of the baking parchment, then place something oven proof and a little heavy in the tray (I used an oven-proof serving dish) This is required to stop your pastry puffing up, whilst keeping nice crisp, thin layers. Place the tray in the oven and cook for 20-30 minutes until the pastry is a dark golden brown. Repeat this with the other two trays. (you can try cooking all the pastry at once if you have enough shelves and trays, but I found the pastry at the bottom of the oven didn't cook quite as evenly).
- Once cooked, take the pastry out of the oven, take the top tray and baking parchment off and leave to cool. Then start on your custard.
- Add the milk and cream to a large pan. Take your vanilla pod and slice in half lengthways. Scrape out the seeds and place the seeds and the vanilla pod in the milk/cream mixture. Heat until just boiling. In a large bowl, mix the cornflour, egg yolks and caster sugar. Add a little splash of the boiled milk to the egg mixture and whisk in quickly. Add another couple of splashes and mix in. This will temper the mixture so the eggs don't get scrambled by the hot milk. Now you can add in the rest of the milk, and give it a whisk. Give your pan a quick wash and dry, then pour the milk and egg mixture back into the pan. Heat on a medium heat stirring with a whisk all the time until the custard is very thick. It will take about 5-6 minutes. It will look like it's not going to thicken, but then it will suddenly thicken very quickly, so make sure you're stirring to prevent lumps. Once thickened, turn off the heat and stir in the butter until it's incorporated. Pour the custard into a tub, allow to cool for 5 minutes, then place some clingfilm directly on top of the custard - so it's touching all of the top of the custard - and leave to cool completely (this prevents a skin forming on the custard). If you're making the custard in advance, you can place in the fridge once cooled until you're ready to use it.
- Now you're ready to construct the vanilla slices. Take your 20x20cm cake tin and place the large piece of puff pastry in the bottom. It should fit quite snugly. If it's a little too large, just trim the edges with a sharp knife. Spread half of the custard over the pastry, ensuring it's all covered. Place 16 of the pastry squares on top, so you have a checkerboard effect and the custard is completely covered. Press them down gently so the pastry sticks. Again, you can trim some of the squares if required, you just need to ensure these squares line up with the top layer ready for when you cut the vanilla slices.
- Carefully spread the rest of the custard on top, covering all of the pastry. Then place the remaining 16 pastry squares on top. Cover in baking parchment and seal the baking tin with foil, then place in the fridge for a few hours (or preferably overnight) to completely set. So long as your custard is thick, the pastry won't go soggy (it takes about 48 hours for pastry to start to soften).
- After it's set, you can make the hazelnut crunch and icing.
- Make the hazelnut crunch first. Place a piece of baking parchment on a tray and put to one side. Have another piece of baking parchment on standby. Add the sugar to a small, heavy bottomed pan, ensuring it's in an even layer and heat slowly. The sugar will slowly start to melt at the edges first. Continue to heat until the caramel on the outside is molten and golden brown with a couple of bubbles starting to appear. Do not stir! This should take about 4 - 5 minutes. Turn off the heat before the sugar goes too brown, as it will burn very quickly. There may still be a tiny bit of unmelted sugar in the middle. This is ok, just leave the pan for about 30 seconds to allow the remaining bit of sugar to melt. Working quickly, add your nuts and stir with a wooden spoon, tip it out onto the baking parchment, place the other piece of baking parchment on top and then flatten the mixture out very quickly using a rolling pin. Don't touch the mixture as it will still be very hot. Allow the nutty caramel to cool and harden ( about 5 - 10 minutes), then peel the baking parchment off and break it up into small pieces using your hands.
- Make the icing by whisking the icing/powdered sugar with 3 tbsp of cream, then add in more cream a tbsp at a time until you have a thick paste. You're looking for a thickness where you can lift the whisk, and the trail will remain for a second or two before sinking back in.
- Take the vanilla slice out of the fridge and uncover. Release the base from the tin and very gently slide the vanilla slice onto a chopping board, then gently spread the icing over the top. Sprinkle the nuts over the top. Using the side of the vanilla slice as guide for where the little squares are, cut the dessert into 16 squares using a large knife. Try not to saw at the desert too much, and give your knife a wipe after each cut. You can serve straightaway, or you can place the slices in a sealable tub and refrigerate until you're ready to serve. Ideally they should be eaten within a day.
Recipe by at https://www.ideahacks.com/vanilla-slice-hazelnut-crunch/